Sunday, September 26, 2010

The Great Mayonnaise Rescue

With all the hoopla going on about salmonella in eggs, I think now is a good time to take a stand. I'm very careful about food safety in my kitchen. I wash my hands after touching raw meat, I use a plastic cutting board for meat so that I don't contaminate the wood board I use for veggies, and I use a thermometer to ensure I'm cooking my meats to the proper temperature. But there is one thing I refuse to stop doing, and that is eating raw eggs. I love undercooked and raw eggs--their creamy texture, their rich flavor--and I love what they do to foods made with them. I will not, absolutely will never stop eating raw eggs no matter what food scares occur.

One of the reasons I'm able to take a stand, of course, is that I don't buy eggs from the grocery store, ever. I buy them from Farmer Tom at the farmer's market. Farmer Tom is an awesome farmer who sells the best, most delicious medium and large free-range pastured brown eggs. And if you're a little kid or pretty girl, he does magic tricks with a rubber band while you buy your eggs from his stand. (Also, when I told him that his eggs were the most delicious, he said "I'll tell the chickens!" which is adorable.)

So since I have too much to do today to make a full dish, I decided to make a favorite sandwich--BLTs--and do it with homemade mayonnaise to make up for the aoli fail that occurred a few months ago. People make mayonnaise all the time, so it can't be that hard, right? I just had an off day with the aoli. I decided to try the mayonnaise recipe from Ad Hoc at Home, to see if the recipe would make any difference.

So, I gathered my mise--four egg yolks, lemon juice, salt, and 2 cups canola oil (I added some peanut to the oil, as I didn't have enough canola).


I put the yolks into the blender (to see if it worked better than the food processor) and mixed them.


Next, with the blender running, I began to trickle oil, very slowly, into the top of the blender.


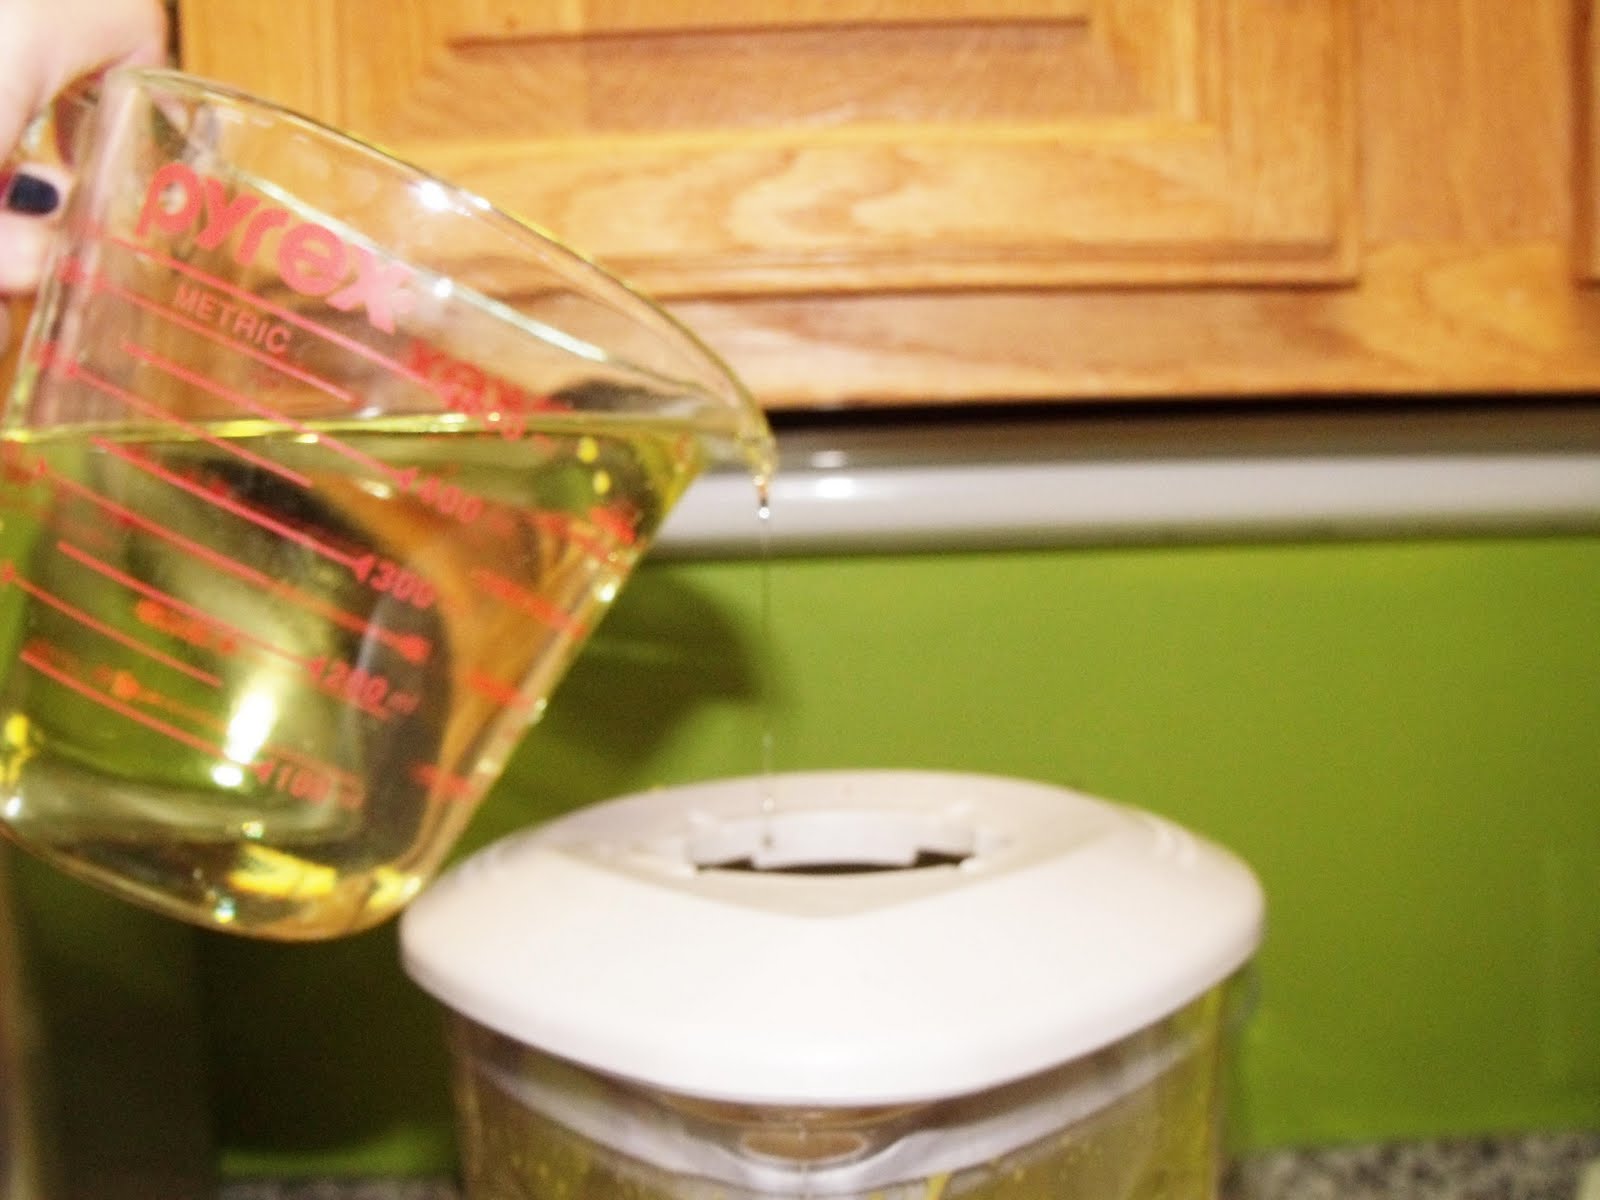
With mayonnaise, and all the other "aise" sauces (hollandaise, bernaise, aoli..aise...) the most important thing is to add the oil slowly, almost drop by drop, to allow it to emulsify with the egg and prevent it from separation. Too much oil at once, and the sauce will separate into the runny failure.

For a while, things looked good. The mayonnaise was thick and creamy, and I kept adding the oil s-l-o-w-l-y while stopping to scrape the sides of the blender.


But once half the oil was in, the noise in the blender changed and liquid started spurting up out of the hole in the lid--oh no...


Blech. Nasty, runny, separated mess.

I stomped around the kitchen for a while but then remembered that there is, actually, a way to save separated mayonnaise--and now was the time to try it. I abandoned the blender in favor of a hand beater and a bowl. I beat another egg yolk:


Then, little by little, I added the separated mess to the yolk, beating all the while. This, finally, did the trick, and the mayonnaise came together, even when I added the remaining oil, the lemon, and the salt. The finished product was eggy, lemony, salty... perfect.


I spread it over fresh toasted bread, and added tomatoes and lettuce from the market, and some crisped bacon.


The result was delicious (though the bacon plus mayo was a bit salty without very thick slices of tomato to balance it out). A delicious lunch, and I'm slowly but surely feeling better about cooking again.

Oh, and by the way, we didn't out those egg whites to waste. Husband J made us Ace Cocktails, a concoction of gin, cream, egg white and maraschino. A little sweeter than I usually like, but I do love that egg froth mouthfeel. Delicious.

Lessons Learned: Nico's new rules of mayonnaise: 1) Raw egg is delicious. Buy your eggs from farmers, and don't be afraid of them. 2) Pour the oil in as slowly as you can. 3) If it separates, don't freak! Just pour the separated sauce into a new egg yolk and it will solidify much better.

I'll try the aoli again using these rules, and this time I have confidence that I will succeed!

Sunday, September 19, 2010

Another hellish week, but this time I am trying not to let that stop me from cooking this weekend. So I picked a very simple dessert--chocolate mousse. I've made mousse a few times, and it has the benefit of being relatively quick and easy to make. The real question is whether the Les Halles mousse is somehow better or more exciting than other types of mousses.

At first glance, this is the only mousse I've made that has Grand Marnier, which is exciting.

I started out by setting up my mise... some unsweetened chocolate, cointreau (since I didn't have Grand Marnier), four eggs (separated) and butter.


I melted the chocolate over a double boiler. I usually play fast and loose with my chocolate and sort of hover over the gas flame instead of bothering with a double boiler, but decided to be safe this time.


Next, I poured the cointreau into the melted chocolate and...?? The chocolate seized up weirdly. For a bit I thought I'd burned it, which was a problem, since I didn't have any more cooking chocolate left. I decided to try to continue on with the recipe since the chocolate didn't taste burnt, but was not hoping for the best.

Next I added the butter and egg yolk to the chocolate. It looked a bit grittier than it was supposed to, but at this point I was all in.


Next step, lighten the mousse. I whipped the egg whites until they reached soft peaks, and then folded them into the warm chocolate mixture.


Then I did the same with some heavy cream, and folded the entire mix together.


I dolloped the mousse into some martini glasses, and chilled it in the fridge for two hours.


The verdict--very nice. The gritty texture was there, but not as pronounced as I feared. Husband J hovered it down, praising the "cakey" texture, then promptly complained about how sick he felt after wolfing the mousse. I was more reserved and only ate about a third of mine, which ended up being just right.

So, not a bad dessert recipe, pretty easy for the end of a busy week.

Sunday, September 12, 2010

A Confessional Post and a Simple Fall Meal

So for the past few posts, I started most of them off apologizing for not blogging every week which was my stated goal. That's pretty boring, so I won't do that here, but I do feel the need to explain a bit why I've been so lax about posting about meals since July.

First of all, it's been a pretty intense work year for me, with most of my projects coming up essentially last-minute. This has been causing a lot of interruptions in my domestic life, particularly the project that started up at the end of July, and is continuing into November. I'm commuting to another city daily (when I'm not spending the night in hotels) combined with working extended days, and it's just exhausting. Husband J is picking up a lot of the ensuing slack around the house, and that includes packing lunches and making dinner. He's been amazing about it, but it has kept me out of the kitchen for the past month and a half.

Second, I haven't had much kitchen motivation lately, even when I have a little time to be in the kitchen. The last time I cooked something intense (Parisian style herb gnocci from the Bouchon cookbook) was a month and a half ago, and since then for some reason, flipping through cookbooks (once a favorite pastime) has left me feeling overwhelmed and depressed rather than energized and excited. I think this has a lot to do with me just being tired in general, and will pass once my schedule returns to a more reasonable level. But it's not a nice feeling when you can't get excited about something that used to give you so much inspiration.

Finally, I just have to say it... it's fall. And I hate fall. Everyone and their mom loves fall because of the crisp weather and the feeling in the air, but all I can think of is the end of warmth and sunshine, and the ensuing horrible, grey, gloomy winter. This is causing a little bit of a mood disconnect in the house, as Husband J loves fall. (In six months it will be my turn to gloat--I love spring, and Husband J hates it.) So, I'm doing my best to think about good fall things, and keep optimistic. I hope that with a little effort, I will be able to get my energy and my desire to cook back! So, even though I'm feeling pretty ill today, and even though it's a rather nasty, cloudy, rainy day, even though I spent much of yesterday crying because I missed the sun, and even though I have to be away from home all week next week, I'm going to make a very easy meal for tonight's dinner and get inspired again.

So, here we go. Roasted poussin and sautéed spinach.

First thing. I went all gaga over Tony's roasted chicken at the beginning of this experiment, and the only excuse I can give is that it was really my first ever roasted chicken. I have since seen the light. No no, it is Thomas Keller's roasted chicken that truly wins.

I 'splain. And I must admit in this blog dedicated to Tony Bourdain that Thomas Keller will always be a better chef. Of course, it is to Tony's credit that he freely admits this, and never tries to compete. So when I tried Thomas Keller's favorite roasted chicken recipe, I had no doubt it would be better than Tony's and it was. And there's just one simple secret to it: no moisture.

Yeah, Tony's recipe has all these mouthwatering ingredients like lemon and herb butter, but the thing is, all those lovely things add moisture, which is death to roast chicken's crispy, crunchy skin. So for Mr. Keller's roasted chicken (here a poussin, that is, a young chicken under 2 lbs), all we do is take the chicken, pat off all the moisture, and season the skin with salt and pepper. That's it!


Then put it in the oven at 450 for an hour and when you take it out, there's this golden brown deliciousness all over the bird. My god.


For a side dish, I wanted something green, so since spinach was the only veggie I had in the house I decided on spinach sautéed with garlic. This is another crazytown, dead easy recipe. Warm some oil in a pan, add some chopped garlic, then a bunch of spinach leaves til they get all coated with oil and garlic and deliciousness. That's it. Then you serve.


Husband J admitted while we ate that he doesn't necessarily crave roasted chicken, and that he always hearkened back to the rotisserie chicken of his childhood--you know, that junk in the plastic clam shell from the grocery store, or the Boston Market. But this is much better, with its salty, crunchy, peppery crispiness, and makes him want to come back for more. I tell him he needs to learn how to roast the chickens, and make them for me!

So that's my simple fall dinner. I hope that will jump start some cooking in the near future, and that, at least, it makes you hungry for more. It did the trick with me.

Sunday, July 18, 2010

Veau Viennoise, Leeks Vinaigrette

Mmhm. Two huge back to back work projects plus a complete hard drive crash spells B-U-R-N-O-U-T. I decided to take a break from cooking and blogging for a bit just to maintain sanity. Now I'm back and it's time to play catch-up!

One of the last things I cooked before taking hiatus was Veau Viennoise--that is, fried Veal scallopine. This is the first real veal dish that I've made from this cookbook, since I'm honestly not too keen on veal. It's not a very nice process to make veal (and this is from the girl who happily laps up foie gras at every opportunity), and even if I weren't bothered by that, I just don't find the taste that great. But I decided to give this dish a try when I found some free-range veal at the farmer's market, for a limited time this spring.

Ok I know you are scratching your head at the oxymoronic term "free-range veal," but here's the thing, the veal is made by never locking the calves up, but keeping them with their mother before they are slaughtered. Which is not PETA approved, naturally, but a little better than the pro-chainy variety of veal. So, I decided to give this dish a shot.

Here's a shot of the veal. It actually looks pretty good, doesn't it?


I started out by making the garnishes for the veal. Some nice fat lemon slices, chopped up hard boiled egg, and anchovies rolled around single caper berries. This was a pretty promising start.

Next, I made some bread crumbs by toasting some bread slices, and whizzing them through the food processor. (Pretty easy and way better than those horrible blue cans!)

Then I set up the veal assembly line: beaten eggs, seasoned flour, and bread crumbs.


It is pretty easy to see what to do here. First dredge the meat in the flour, then the egg, then the bread crumbs until they are nicely coated. The meat gets refrigerated for a few hours.


While the meat chilled I made a side dish--leeks vinaigrette with sauce gribiche.

First I sliced the leeks in half so that they could soak, removing the grit from their layers.


Then I made sauce gribiche, which consists of chopped hard boiled egg, cornichons, capers, and parsley mixed with peanut oil and vinegar.


The leeks get boiled for about ten minutes until they are tender, then dressed with the sauce gribiche.

Finally, it is time to fry up some veal! I heated peanut oil in my sauté pan, then fried the scaloppine until the crumbs were golden brown.


Once the veal was all fried, I served them topped with lemon slices, caper and anchovies, and alongside chopped onion and hard boiled egg, with leek vinaigrette.


Also, champagne.


Looks good, but how did it taste? Well, it was okay. The veal itself was not bad, and I enjoyed it with far less guilt than non free range veal. But to be honest, the whole breaded and deep fried meat thing is not my favorite thing to eat, even though this was a good specimen of the species. I did like the mixed pickle/egg flavor of the sauce gribiche on the leeks, and would definitely make that again. All in all, not a bad dinner, but not my favorite.

However, one of the benefits of this dish was that I realized that deep frying is not so scary after all. Check out what I was able to make:


Yup, I am a fearless deep fryer, and made Thomas Keller's fab fried chicken for a Fourth of July picnic! Next up... frites!

Lessons Learned: Free range veal does exist! Deep frying is not so scary, and can be fun and rewarding.

Next Week: Well... Husband J is on a trip next weekend, so I'm cooking for one. I think I'll make a favorite thing that I DON'T want to share. That would be escargots, the world's greatest excuse to eat pretty much melted butter for dinner. Whoo!

Sunday, June 6, 2010

Chartreuse of Quail

So, who here is sick and tired of me whussing out on this project with soup? Yeah, me too. So I decided that this weekend, I would need to step up my game and make something truly fancy. I was musing over this one morning, thinking of what I could make while flipping through the book, and then turned to the page for Chartreuse of Quail. This multi-step dish involves a truly stunning layered presentation, and specialty ingredients. It would be perfect... if I could pull it off.

First thing is to get the specialty ingredients. Chartreuse of Quail calls for... quail, duh, but also foie gras. These are both pretty hard to find under normal circumstances, even in a big city with a Whole Foods every couple of miles. Foie gras in particular is pretty hard to come by locally, considering Whole Foods has stopped selling lobster for humanitarian reasons. However, there is always the magic of MAIL ORDER MEATS! Yep, there are companies that will overnight foie gras, or whatever interesting and exotic cut of meat you'd care to order. I went with D'Artagnan, which is a venerable company, and much discussed in food blogging circles. D'Artangan sells four-packs of whole quail, and 5-ounce packs of foie gras for what I consider a very reasonable price. I ordered the packs to be delivered overnight for a Friday morning delivery, the day when Husband J takes advantage of his government-mandated flex time. He me the Fed-Ex guy at the door, and our ingredients were safe in the fridge.


Okay, hurdle one accomplished. Next, time to debone the quail. Chartreuse of quail calls for the breasts of the quail to be separated from the rest of the body, and the legs reserved as a garnish for the dish. This is fine when you have a chicken, but with a quail, it's easy to cut straight through the fragile bones and leave sharp points that could cut an unwary eater. I used a paring knife to cut down the sides of each quail's spine, and separated the bones from the rest of the carcass as follows:


Tiny quail bodies.


Cutting the breasts away...

This left me with eight breast slices, and eight legs. I seasoned the breasts with salt and pepper and sauteed them, skin side down, for five minutes.


Then I took the breasts, which were only partially cooked, and set them aside.


I also sauteed the quail legs for use as a garnish.


Next, it was time to prepare the cabbage. I peeled big leaves off of a head of cabbage, and boiled them for five minutes in salted water. I set the leaves aside.


And then I made stuffing by sauteeing some chopped bacon with carrot and onion until the vegetables were browned.


To this mix, I added shredded cabbage and sauteed it all until it was soft, shiny and wilted--about half an hour.

Finally, I made a rich buttery sauce. I deglazed the quail pan with some port wine.


I set that aside, and roasted the quail carcasses with some butter, carrot and onion in a big pan.


Once the veggies and carcasses were roasted, I deglazed the pan with more port.


Then I transferred all of it to a saucepan. I added some herbs and pepper, and some chicken stock, and simmered the lot until it was reduced by half.


I strained the liquid out into another saucepan, and boiled the sauce for 15 minutes.
Finally, I whisked a good sized knob of butter into the pot for a rich sauce.


Ok, all of the elements of the dish have been made. Now for the hard part... molding the chartreuses. Yes, you heard me right... this dish involves molding all of the ingredients into a layered terrine.

First, I buttered some ramekins, and laid a cabbage leaf into each one, letting the sides of the leaf flop over the sides. Next, I scooped some bacon-cabbage stuffing into each mold.


Then, I layered some foie gras, and two quail breasts over the stuffing.


More stuffing went on top of the breasts, then folded the cabbage leaf over the stuffing. Finally, I topped each mold with a round of bread that had been brushed with melted butter.


I chucked the carefully constructed molds into the oven to bake for about a half an hour. Then, with trepidation, I put on my oven mitt and upturned the first mold onto a plate, and...


OMG IT SO WORKED!!!

Wanna see that again from the side? Oh yes you do.


Awwwww yeah.


When we cut the molds open, a delicious mix of quail meat, foie gras, bacon and veggies greeted us.

According to Husband J, this was one of the best things I'd ever cooked, and that it rivals his prior favorite, the Coquilles St. Jaques. I think the coquilles were better, myself, but I thoroughly enjoyed the delicious quail molds. They were tasty. They were impressive. And best of all, these were super EASY to do. Sure, it took a bit of effort and expense to get the ingredients, and time to assemble the things, but overall, there was not much difficulty in putting these together. And they make such a spectacular product. I'd say that this dish wins the prize for "the dish you want to make to impress someone into thinking you are more talented than you actually are. And by the way, DELICIOUS."

Lessons Learned: Just because the dish looks crazy fancy doesn't mean it's difficult to make. Mail order meats are a viable and not too expensive source of specialty ingredients. Foie gras is crazy delicious.

Next Week: Veau Viennoise

Sunday, May 23, 2010

Tomato and Fennel Soup

Phew. Another hard work week gone by (by the time this posts, a couple of weeks), filled with labor, late nights, and eating at the same restaurant every day of the week with co-workers... the glory of business travel. Funny how those things work. At the start of the week I was thrilled for oxtails and scallops with wine-butter sauce, but by the end of the week I was practically crying for salads and lightly cooked veggies, with maybe a ravioli or two. And because the weekly schedule was work, dinner, work, get to hotel at ass-o-clock AM, try to sleep and fail because of strange hotel room, up, work... by the time I wrapped my lips around a glass of wine, I was about ready to compose florid verse in praises of the grape. Yeah, that atmosphere did not conduct itself to a desire to cook once I dragged myself home. I made a halfhearted attempt at celery remoulade, but was thwarted by the lack of celeriac (I swear I saw it at the market last week... or was it two weeks ago? Guess that will have to wait for autumn, now). I collapsed in exhaustion, and woke up wanting something simple, nutritious, and above all, EASY. So I chose this tomato and fennel soup.

Now, don't get me wrong kids, it is still May, and there aren't any worthwhile tomatoes out yet. But here's the awesome thing, tomato and fennel soup from the Les Halles Cookbook uses tomatoes in a CAN! I used to be mighty skeptical about any food that comes in a can, because in my experience canning tends to turn veggies into a slimy, preserved mess. Just think of all that canned spinach and canned beet you were subjected to as a child! Fresh roasted beet is like an orgasm compared to canned beet, amirite? But recently I have come to love canned tomatoes. This is partly because of a determination to never, ever buy out-of-season fresh tomatoes that I made a few years ago, but mostly because they are just really good for making soups and sauces. They retain their flavor nicely, and the slimy texture disappears once they are cooked down, pureed, or otherwise assembled.

Also, in non-conformance with the rest of my project, I ended up making this soup on a weeknight. Yes, you heard me. It is that easy.

First, I cored two fennel bulbs by cutting them into quarters and removing the core. I sliced them on my mandoline until I had a stack of slices.


A lovely fennel root.

Next, I chopped an onion and a potato.


The potato, onion, and chopped fennel.

I heated some olive oil in my big pot, then added the veggies and cooked them for about ten minutes.


Next, the tomatoes went into the pot to cook.


Finally I added 6 cups of chicken stock and cooked the whole mess for an hour.


Once the soup was cooked, I blended it all with a hand blender, and added salt and pepper.


To serve, I added salt and pepper, and squirted some balsalmic glaze that I had left over from a French Laundry Cookbookexperiment in a Jackson-Pollocky design I served the soup alongside some grilled cheese.


The color is kind of odd, isn't it? Instead of the murky, red color of canned tomato soup, this is more of a milky orange. But let me tell you, this soup is incredibly delicious. It's creamy with no dairy (yay, potato), and thick to stand up to dipping a grilled cheese sandwich into the bowl. The balsamic glaze is no mean feat either!

Lessons Learned: Making tomato soup from scratch is easy, delicious and satisfying. And it can be done on a weeknight!

Next Week: Something fancy: Chartreuse of Quail.